
Depending on the settings selected when the batch was created, the system may or may not automatically issue tax receipts to donors with email addresses.
Note: Please remember to enable the tax receipting option for your batch (Watch the first video "Create a Batch" to learn how this option can be enabled).
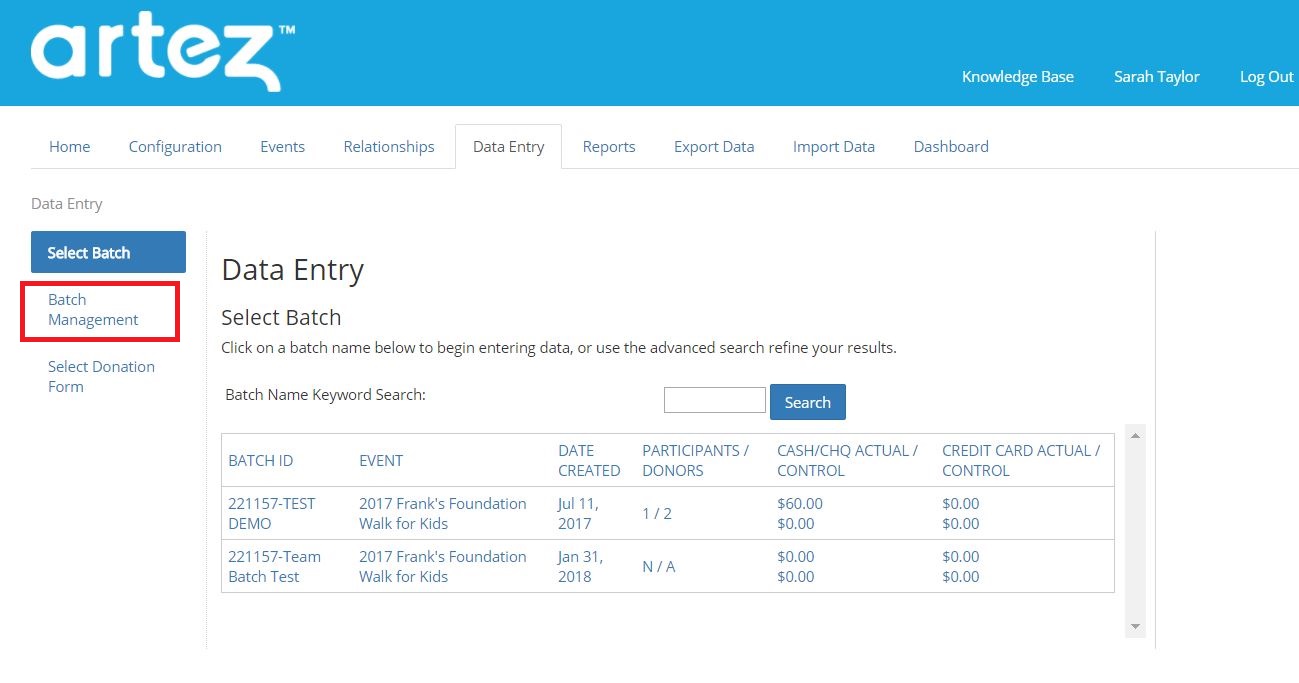
Step 1 Click the Data Entry Tab
Select Batch Management
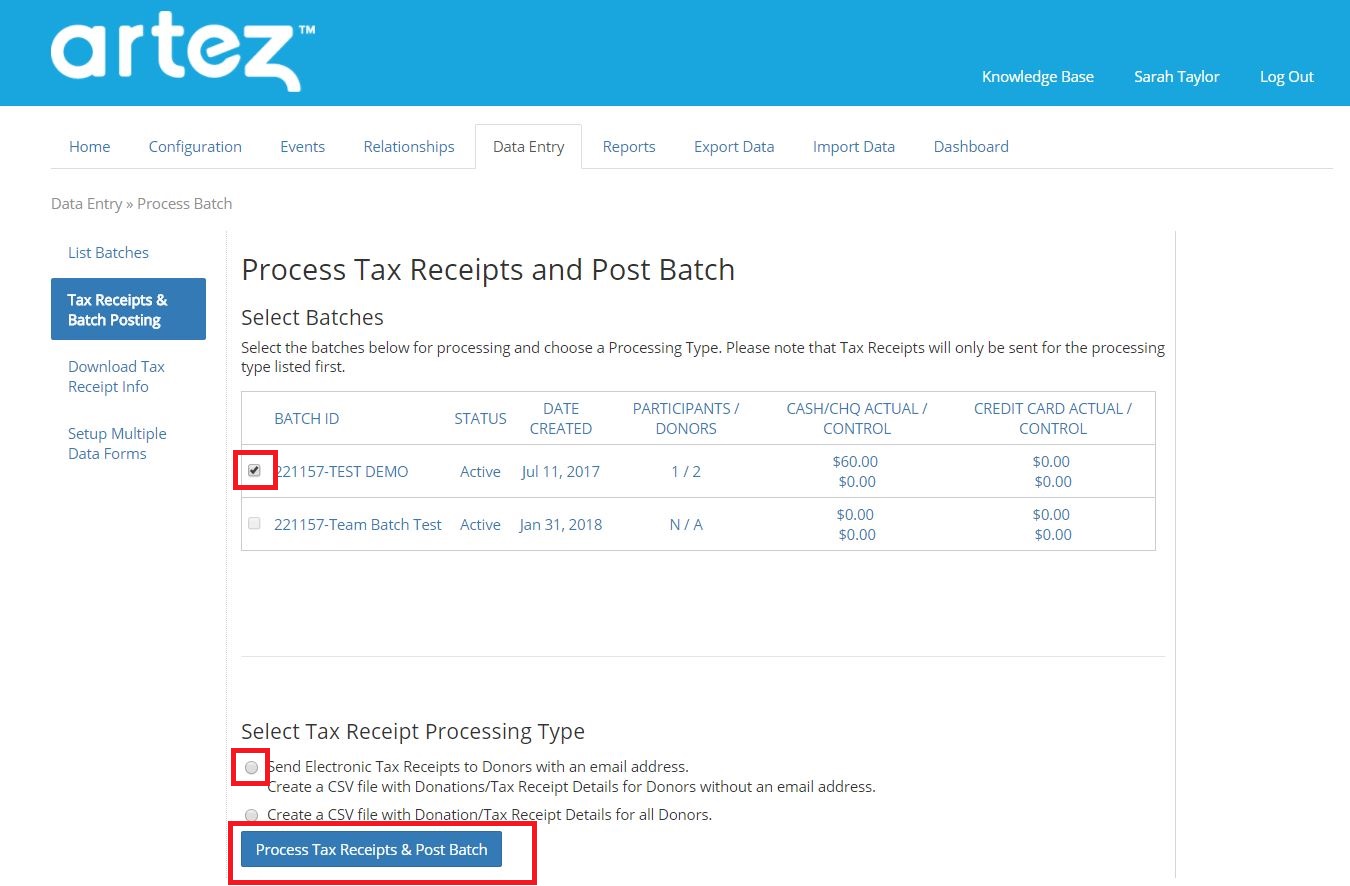
Step 2 Click Tax Receipts & Batch Posting
Select Tax Receipts & Batch Posting.
Select the checkbox beside each batch you want to post. (Only batches with at least one donor entered are available for selection.)
Below the Select Tax Receipt Processing Type heading you have two choices:
If you want to automatically send tax receipts to everyone with an email address, click the first option. If there is anyone without an email address, a CSV file (containing the data for these people only) will be created that can be downloaded and imported into another system for processing receipts
If you want to process all tax receipts on another system, click the second option. A CSV file (containing everyone’s data) will be created that can be downloaded and imported into another system for processing receipts.
Click Process Tax Receipts & Post Batch.
A confirmation message appears and a check mark appears beside the batch(es) you processed. You can no longer work with these batches.
Comments
0 comments
Please sign in to leave a comment.