
Step 1 Configuration Tab
Learn how to:
- Specify a contact to receive an email if the block of tax receipt numbers is running out
- Specify multiple contacts to receive a copy of each tax receipt issued to your donors
- Whether to setup a different receipt for each location, or use the same receipt for many
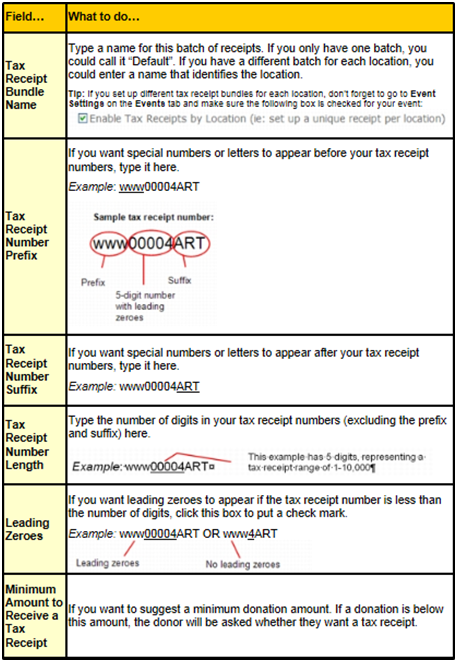
- Set up the style of your tax receipt numbers and a minimum amount
- Set up blocks of tax receipt numbers
- Set up the appearance of your tax receipt
Step 2 Administrator Email Address
To specify a contact to alert when receipt blocks are running out, type the email address of someone in your organization who will be responsible for maintaining the blocks of tax receipt numbers. The system will send this person an email when 150 receipts are left in the block and again when 20 receipts remain.
You can also send a copy of tax receipts that are issued to your donors to multiple administrators. To set this up, simply enter the email address of the admin(s) who should receive the copies. If there are multiple admins, separate them by a semi-colon (;) and hit submit.
Step 3 Click set up a new receipt bundle
Tip: Almost always set up your Default Primary bundle. You only need to set up new bundles if your organization will be issuing receipts by location. Otherwise, just edit the default bundle instead of setting up new ones.
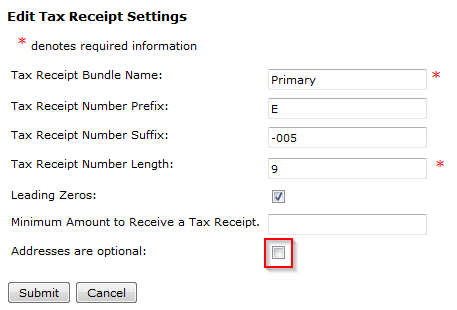
Click Edit Tax Receipt Settings. Here is where you can assign tax receipt numbers and minimum donation amounts
Definitions
Tip: For each tax receipt bundle, you can specify whether a tax receipt can be issued without a post address. To enable please give a check mark next to "Addresses are optional". This is NOT recommended for Canadian charities as a post address is mandatory on an official Canadian tax receipt.
Step 4 Click to setup your Tax Receipt Number Block
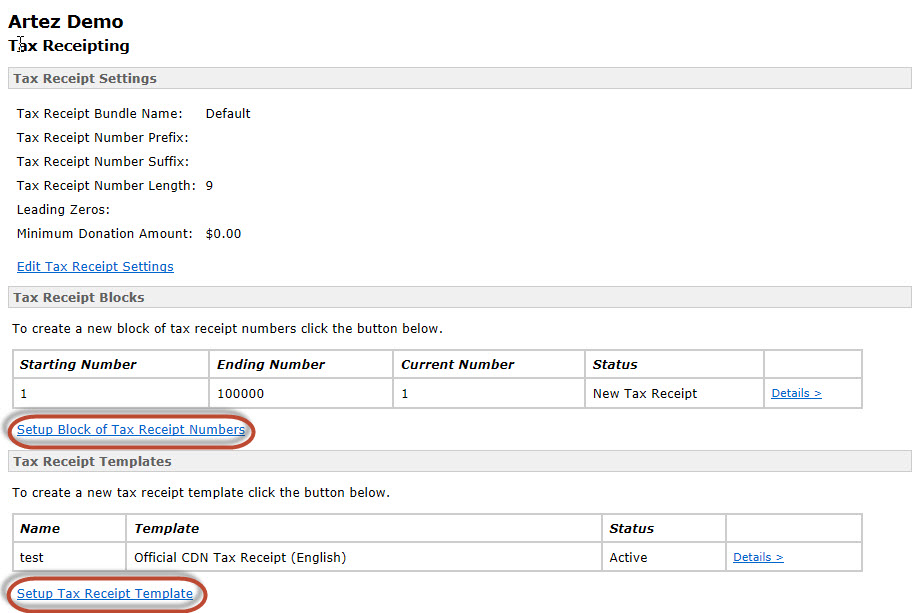
Tax Receipt Numbers
Notes:
- Current Number displays the last tax receipt number actually issued.
- Status displays whether the block of numbers is active, expired, or not started yet.
- Once you have set up your blocks of numbers, you can click the Details link to change the ending number or expire a block of numbers. When you expire a block of numbers, the next block automatically starts.
- It is important to monitor the status of your blocks of numbers so you never run out.
Step 5 Click setup Tax Receipt Template
Fill in the above page as follows
- Name: add a name that will identify the tax receipt template to add to emails.
- Status: choose Active to ensure the tax receipt is available to attach to emails. If you no longer need a template, you can update it to Inactive.
- Receipt type: in Canada, please choose Official CDN Tax Receipt which does not allow you to change legally required wording. In the US, choose the Editable Receipt which allows you to change the wording according to your requirements.
- Address: add your legal address, email and phone number so donors can reach you.
- Value of Advantage: this field is only used for purchase items. It will show the amount paid by that donor that is not eligible for a tax receipt.
- Additional Text: here you can add the Description of the Advantage (if applicable) and any additional information you wish to share with donors.
- Logo: please upload a .png or .jpg image that is 180 pixels wide and 72 pixels high.
- Signature: please upload a .png or .jpg image that is 188 pixels wide and 63 pixels high.
This is an example of a customized tax receipt:
How to edit the receipt bundle to an existing event
NOTE: All new events will default to the Primary Bundle. To use a bundle other than the primary bundle, you must complete the steps to set up the event and then edit the bundle following the steps below.
- First, ensure that you have created the bundle and receipt templates correctly under the configuration tab (How to set up receipt bundles and templates: https://frontstream.zendesk.com/hc/en-us/articles/204211235-Setting-up-tax-receipts)
- Open the event > Event Summary
- Edit Event Information
- Edit the receipt bundle
- Click Submit
- After attaching the bundle, you may proceed with attaching the receipt templates to the various tax receipt emails in the event
Comments
0 comments
Article is closed for comments.