
To set up table seating, you will want to navigate to the event tab > guest > table seating
Click on Table Seating.*
*If the button is not there, please contact us by clicking submit a Request above. Inform us of your Org and Auction name so we can enable this feature for you.
Important: We recommend all attendees be ready and updated before continuing on below.
Create your venue rooms:
Create Rooms: Enter the dimensions of the rooms of your event. You can create more than one room.
Create Objects: Create the various objects/features of your venue: stage, dance floor, auction area, etc.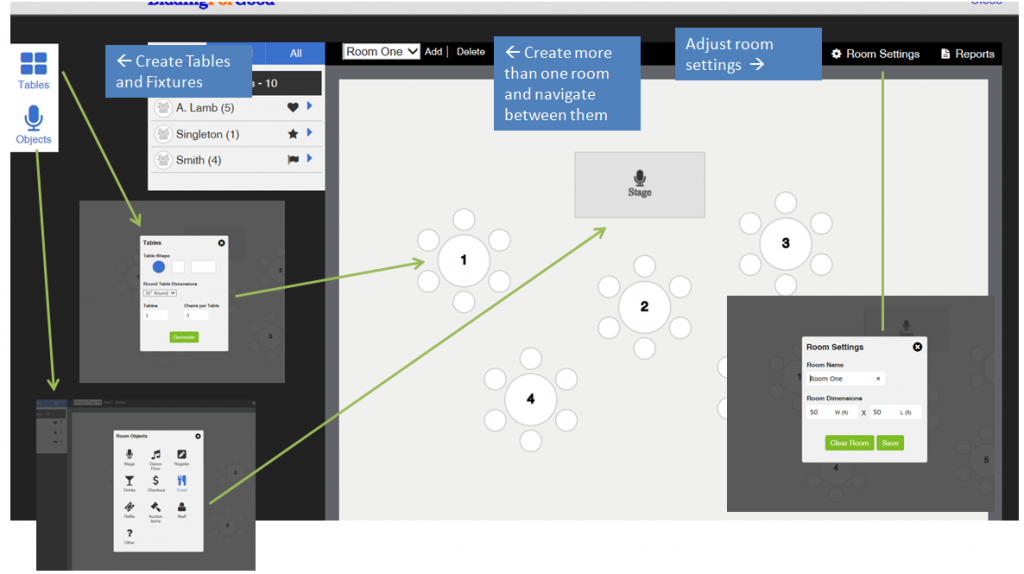
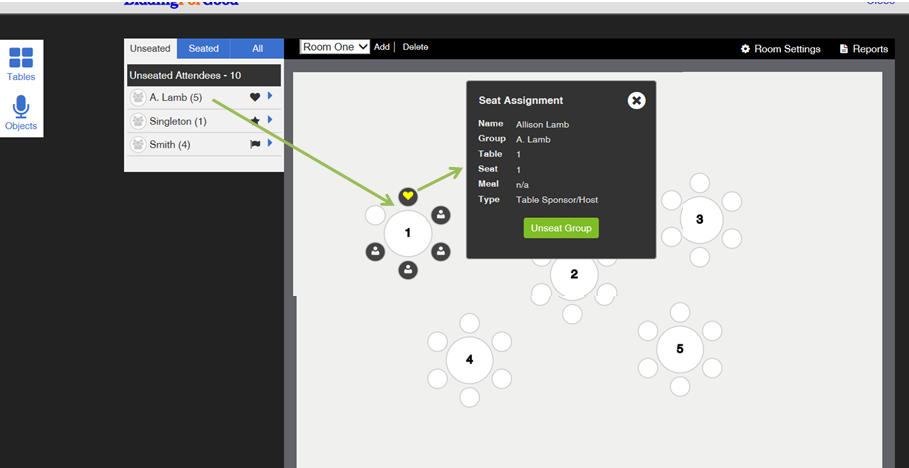
Seat Your Guests:
- Each Group will show in a menu on the upper left.
- Drag and drop each Group to a table.
- Once placed, you can click on each seat to see that guest’s information.
- You can also drag the seats around to change their order at the table.
Symbols:
- These can be assigned on the Event Attendees page.
- Edit the Attendee to assign them a symbol.
- Heart: Table Sponsor/Host
- Star: VIP
- Flag: Table Captain
Download reports:
These are the reports/exports available in the Table Seating section:
Table Layout Report: This provides a printable version of your room layout.
Table Seating Report: This report lists all guests by their table. Columns include table group, meal choice, and attendee type.
Table Seating by Last Name: This report lists all guests alphabetically by last name. Columns include table and seat numbers, meal choice, etc.
Export by Last Name: This report is a CSV export of the Table Seating by Last Name report. This version allows you to change the column order and sorting to make it work for your needs.
Table Cards: This exports as PDF and works with Avery Small Tent Cards (product #5302). The cards include the guests' names and their table numbers.
Name Tags: This export as a PDF and works with Avery Adhesive Name Badges (product #5395). The name tags include the guests' names and their table numbers.
Comments
0 comments
Article is closed for comments.